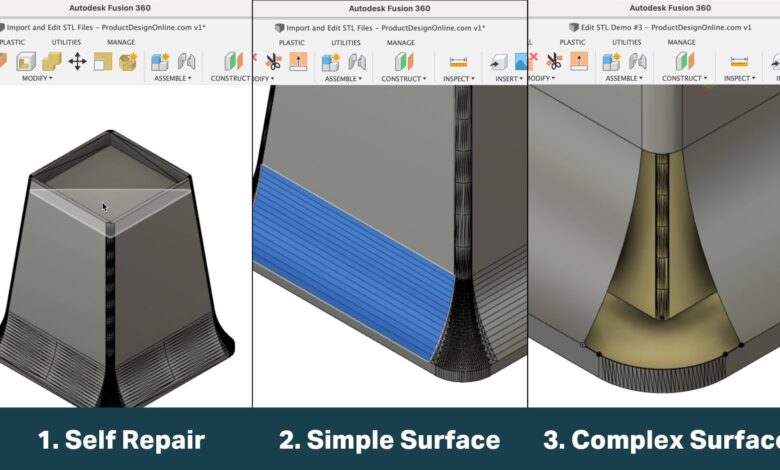
Conquering the Mesh: Guide to Editing STL Files

The world of 3D printing opens a boundless realm of creation, but sometimes, your vision requires tweaking an existing design. That’s where editing STL files comes in – the digital sculpting clay for modifying 3D models before they materialize into plastic realities. But navigating the labyrinthine world of mesh manipulation can be daunting, especially for newcomers. Fear not, intrepid makers! This comprehensive guide will equip you with the knowledge and tools to confidently edit STL files and bring your 3D dreams to life.
Taming the Triangles
Before diving into editing, let’s understand the language of these digital creatures. STL files, short for Stereolithography, represent 3D models as a collection of triangular facets. This mesh-like structure defines the object’s surface, but it can be rigid and unforgiving, making edits intricate. However, with the right tools and techniques, you can reshape these triangles like a digital Michelangelo.
The Edit Arsenal: Software Options Galore
The software landscape for editing STL files is as diverse as the 3D printing community itself. From free and open-source options like MeshLab and Blender to professional-grade tools like Autodesk Meshmixer and ZBrush, each program caters to different skill levels and editing needs.
Free and Open-Source Powerhouses
- MeshLab: This versatile platform packs a punch with mesh inspection, repair, and basic editing tools. Perfect for beginners and advanced users alike, MeshLab offers a gentle learning curve and extensive documentation.
- Blender: A 3D animation powerhouse, Blender also boasts impressive mesh editing capabilities. While its steeper learning curve might intimidate beginners, its wide range of tools and customizable interface reward dedication.
- FreeCAD: For those seeking a parametric modeling approach, FreeCAD allows you to convert STL files into solid models, enabling powerful edits using constraints and relationships.
Professional-Grade Precision
- Autodesk Meshmixer: This robust tool offers advanced mesh manipulation features like smoothing, sculpting, and boolean operations. Ideal for users comfortable with 3D modeling concepts, Meshmixer delivers precision and control.
- ZBrush: The industry standard for digital sculpting, ZBrush grants unmatched freedom for shaping and detailing your models. Its intuitive interface and vast brush library empower artistic expression, but require dedication to master.
Mastering the Mesh: Essential Editing Techniques
Now, let’s get our hands dirty with some practical editing techniques. Remember, the specific tools and workflows will vary depending on your chosen software, but these concepts apply universally:
Mesh Inspection and Repair
Before embarking on modifications, ensure your STL file is watertight and free of errors. Most software offers automatic and manual repair tools to fix missing triangles, self-intersections, and other issues that can lead to failed prints.
Basic Mesh Editing
Once your mesh is healthy, basic editing operations like scaling, rotating, and translating your model are crucial for positioning and fine-tuning its size. Most software provides intuitive tools for these tasks.
Boolean Operations
Combining, subtracting, and intersecting meshes opens up a world of possibilities. Imagine cutting a hole in a model or merging two objects seamlessly – boolean operations unlock these creative avenues.
Mesh Smoothing and Simplification
STL files often contain a high number of triangles, which can impact printing time and file size. Smoothing tools reduce the triangle count while maintaining the overall shape, while simplification algorithms further optimize the mesh for efficient printing.
Advanced Sculpting and Detailing
For those seeking artistic finesse, sculpting brushes allow you to add or remove material, refine edges, and create intricate details. This technique requires practice and patience, but the rewards are boundless creative freedom.
Beyond the Edit: 3D Printing Considerations
Remember, editing is just one step in the journey to a tangible 3D creation. Always ensure your edited STL file is manifold (watertight) and within your printer’s build volume before slicing and printing. Consider testing smaller sections of your edited model first to identify any potential issues.
Conclusion
Editing STL files empowers you to become the architect of your own 3D creations. Embrace the exploration, experiment with different techniques, and don’t be afraid to learn from your mistakes. Remember, every tweak and modification brings you closer to printing your perfect masterpiece. So, fire up your chosen software, open that STL file, and let your imagination take the wheel!
FAQ
- I edited my STL file, but my printer software says it’s not valid. What should I do?
Most software offers tools to check for errors and repair your mesh. Consult your software’s documentation or online resources for specific troubleshooting steps. If the issue persists, consider seeking help from online forums or contacting your software’s support team.
- Can I edit STL files on my phone or tablet?
While there are some mobile apps for basic 3D model viewing and editing, their capabilities are often limited compared to desktop software. For complex edits and detailed sculpting, a computer offers greater precision and control. However, mobile apps can be handy for on-the-go viewing and minor adjustments.
- Which software is best for beginners?
For ease of use and a gentle learning curve, MeshLab and FreeCAD are excellent choices. However, if you’re eager to explore sculpting, Tinkercad offers a user-friendly platform for basic edits and design concepts.
- Can I convert an STL file back to its original format?
Unfortunately, editing typically alters the file’s internal structure, making it difficult to revert to the original format. If you require the original file, consider saving backup copies before editing.


